
NoiseAware is excited to announce our new NoiseAware Knowledge™ Dashboard, available today at dashboard.noiseaware.io.
This is the first of many updates to the NoiseAware platform, all with the goal of saving you time and maximizing your Return on Rental™.
What's New
Updated look, layout, and navigation: More intuitive than ever. Find your favorite features in the Onboarding Guide.
New Live Events page: Real-time views into Noise events across properties, and 24-hours of event history, ensuring minimal noise issues and keep your property Rental Ready™.
Search, filter, and export lists: All of your same NoiseAware data, now easier to find and exportable for custom reports.
Improved NRS Graph. Historical data with enhanced graphing features and simplified design, including information about each property’s zones and events.
Event Reporting: By Popular Demand! No more screenshots required - now you can click on any event to view a detailed report to download and share.
Advanced Administration:. Administrators can now manage alert settings for users on their account, providing a clear picture of who’s being notified about what. There’s also a new view-only Watcher role for team members who should see, but not edit, your NoiseAware data.
We hope you enjoy the new NoiseAware Knowledge™ Dashboard. Please don’t hesitate to send us your feedback and requests. And thank you for being a valued NoiseAware Customer!
Keep reading for a complete walkthrough of the new software.
Login
The new dashboard can be found at dashboard.noiseaware.io, or by logging in from noiseaware.com. If you had a login for our old dashboard, your same email and password will work in the new dashboard. If you are new to NoiseAware, you should complete your first purchase to create an account.
After purchasing NoiseAware, or being invited to a NoiseAware account, you will receive an email with a link to complete account setup.
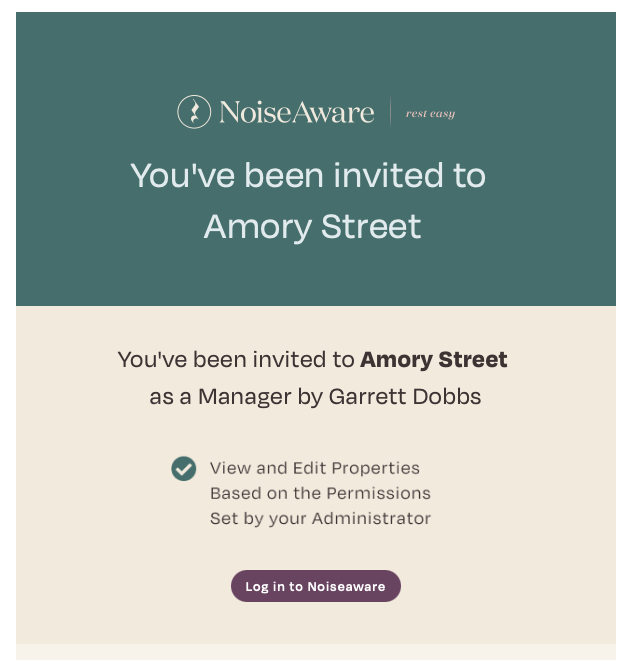
Clicking on this link will take you to a page where you can set your name and password, and log into your account. If you are setting up a new NoiseAware account, you will be guided through a few additional steps to help you get started.

Navigation
The navigation menu on the left side of the new dashboard can take you anywhere you need to go. The links in your navigation are:
- Live Events
- Events History
- Properties
- Organization - only available to users with the Administrator role
You can also access your Account Settings or log out by clicking your name in the top-right.
The new dashboard also has features to allow you to be a member of multiple NoiseAware organizations. If you are invited to a second organization, a new menu will appear on the left side of the dashboard that lists all of the organizations you can access (the default All Organizations option at the top of the list will show you properties from all organizations you are a member of).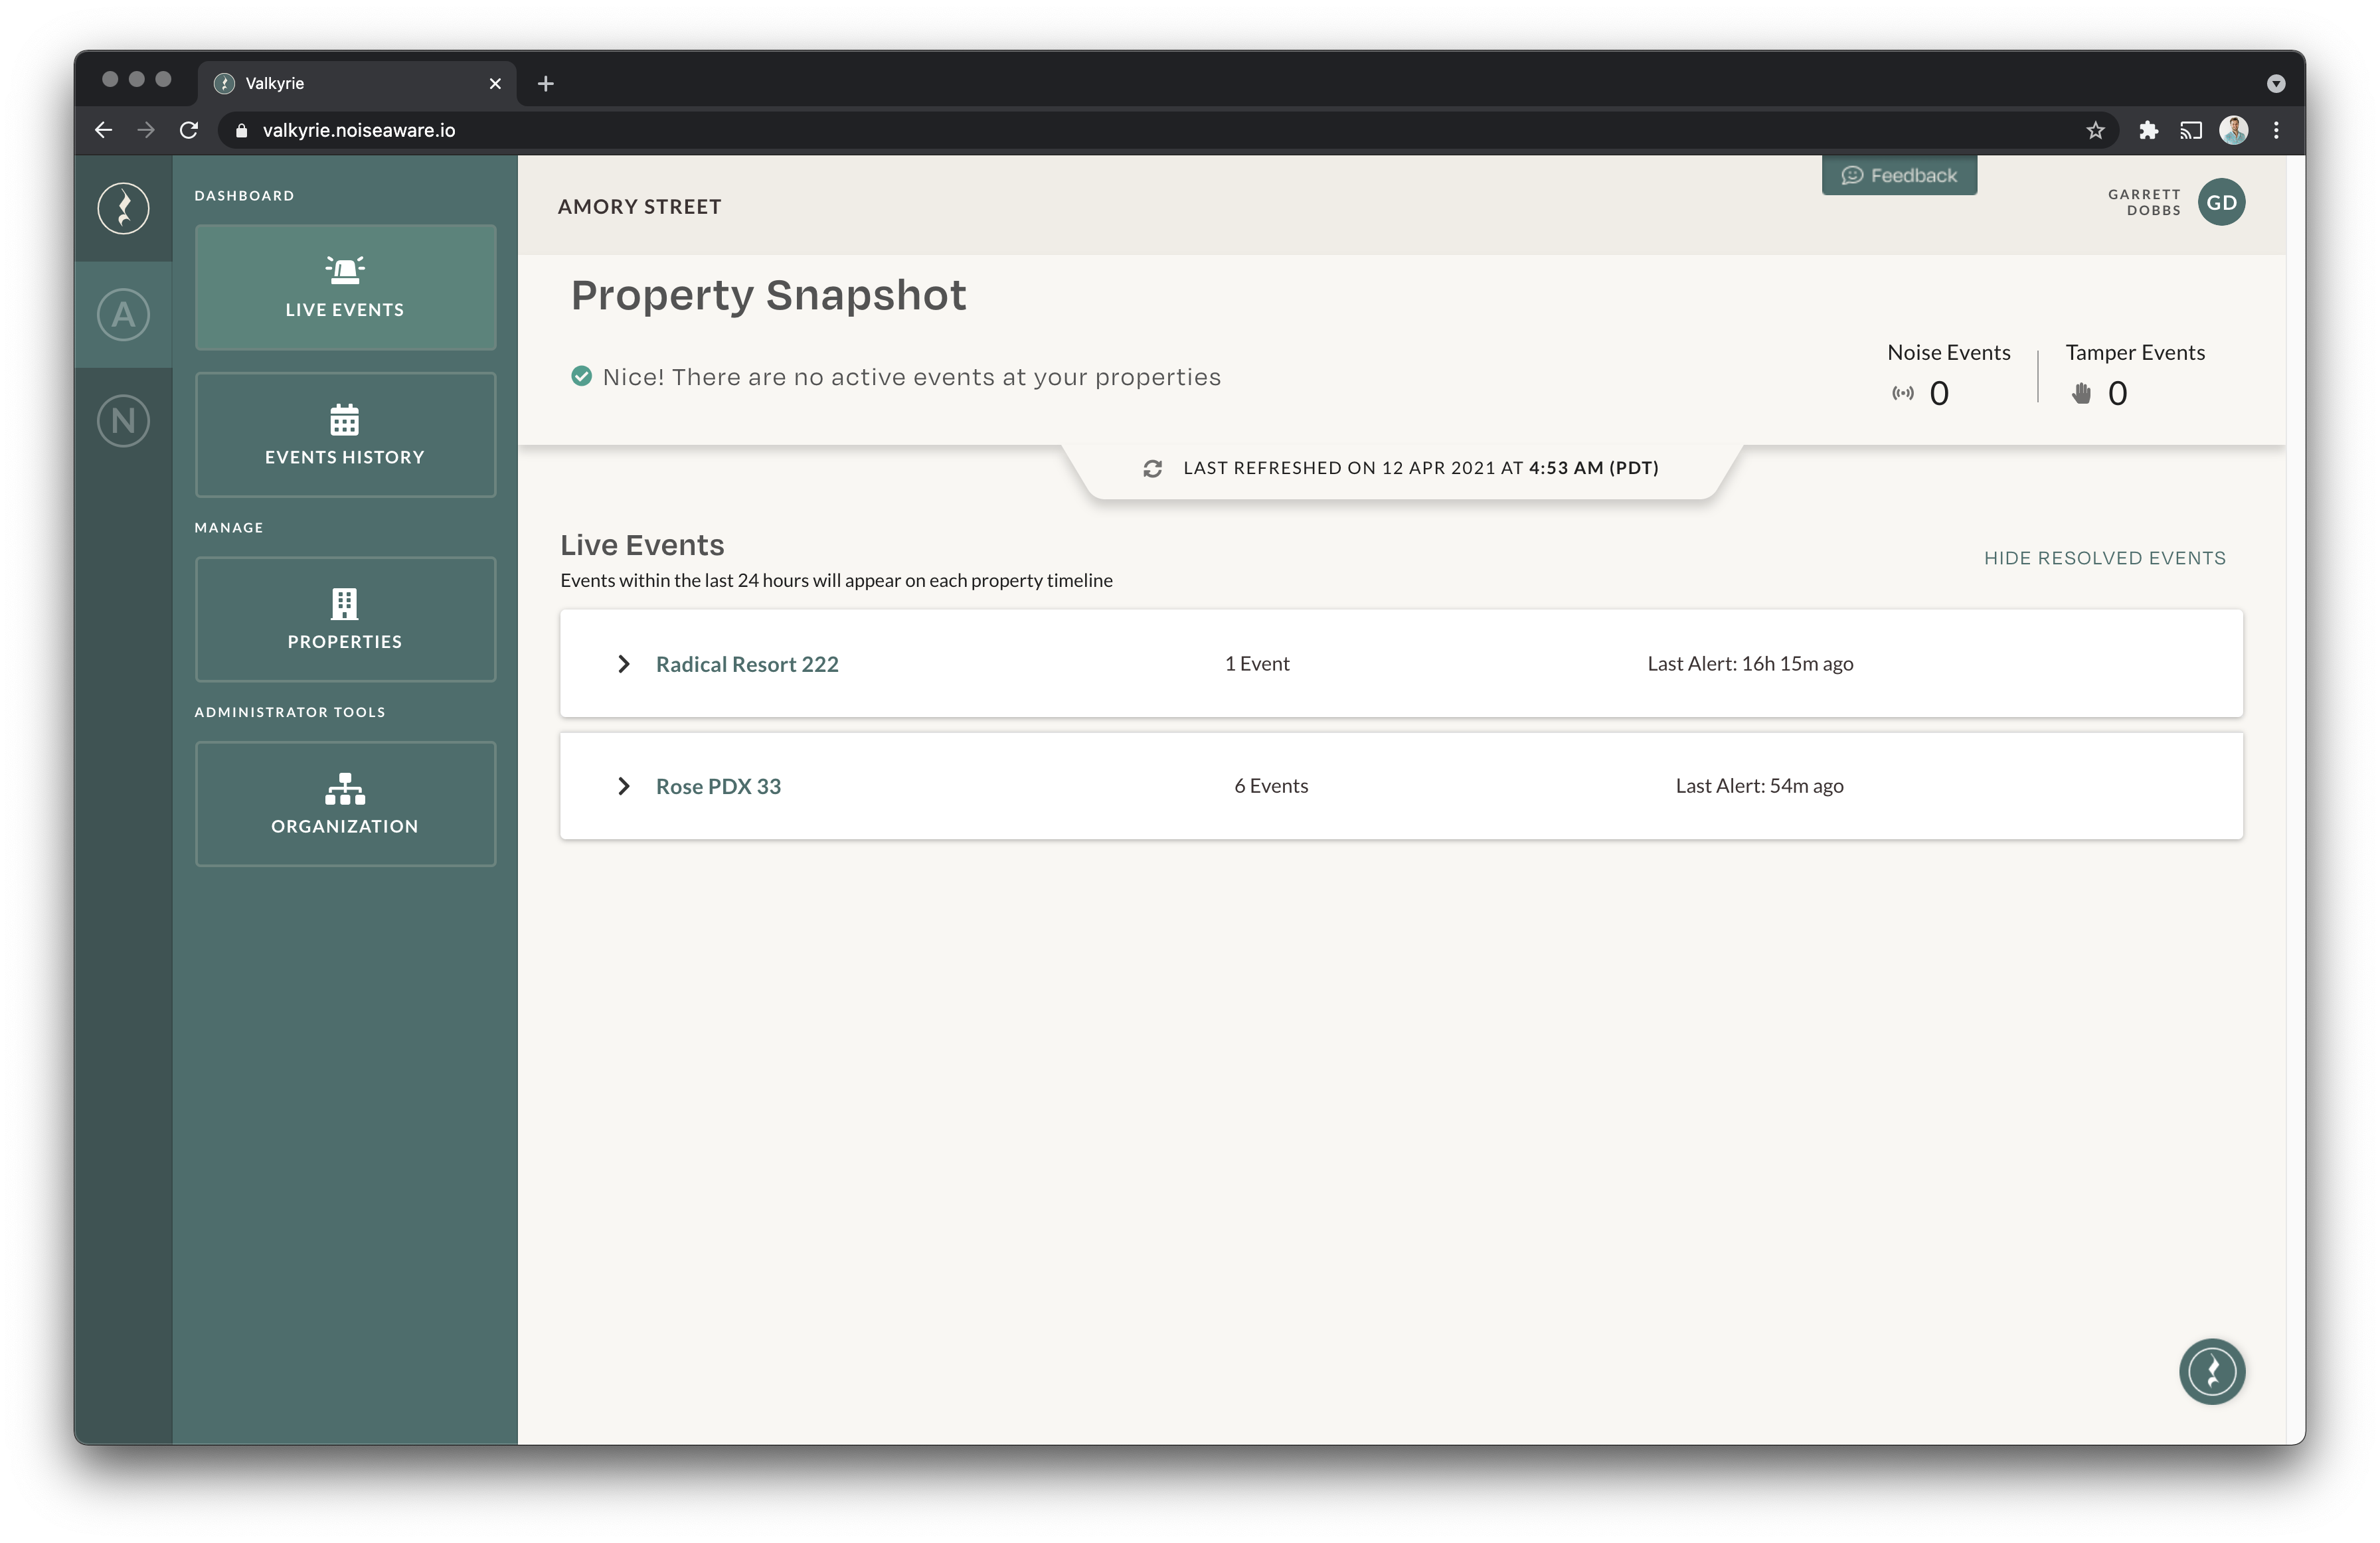
Live Events
The Live Events page is designed to support live monitoring of your properties, and help you make decisions about when to contact your guests. If your company has staff assigned to manage noise, we recommend they keep this screen open in a tab on their browser.
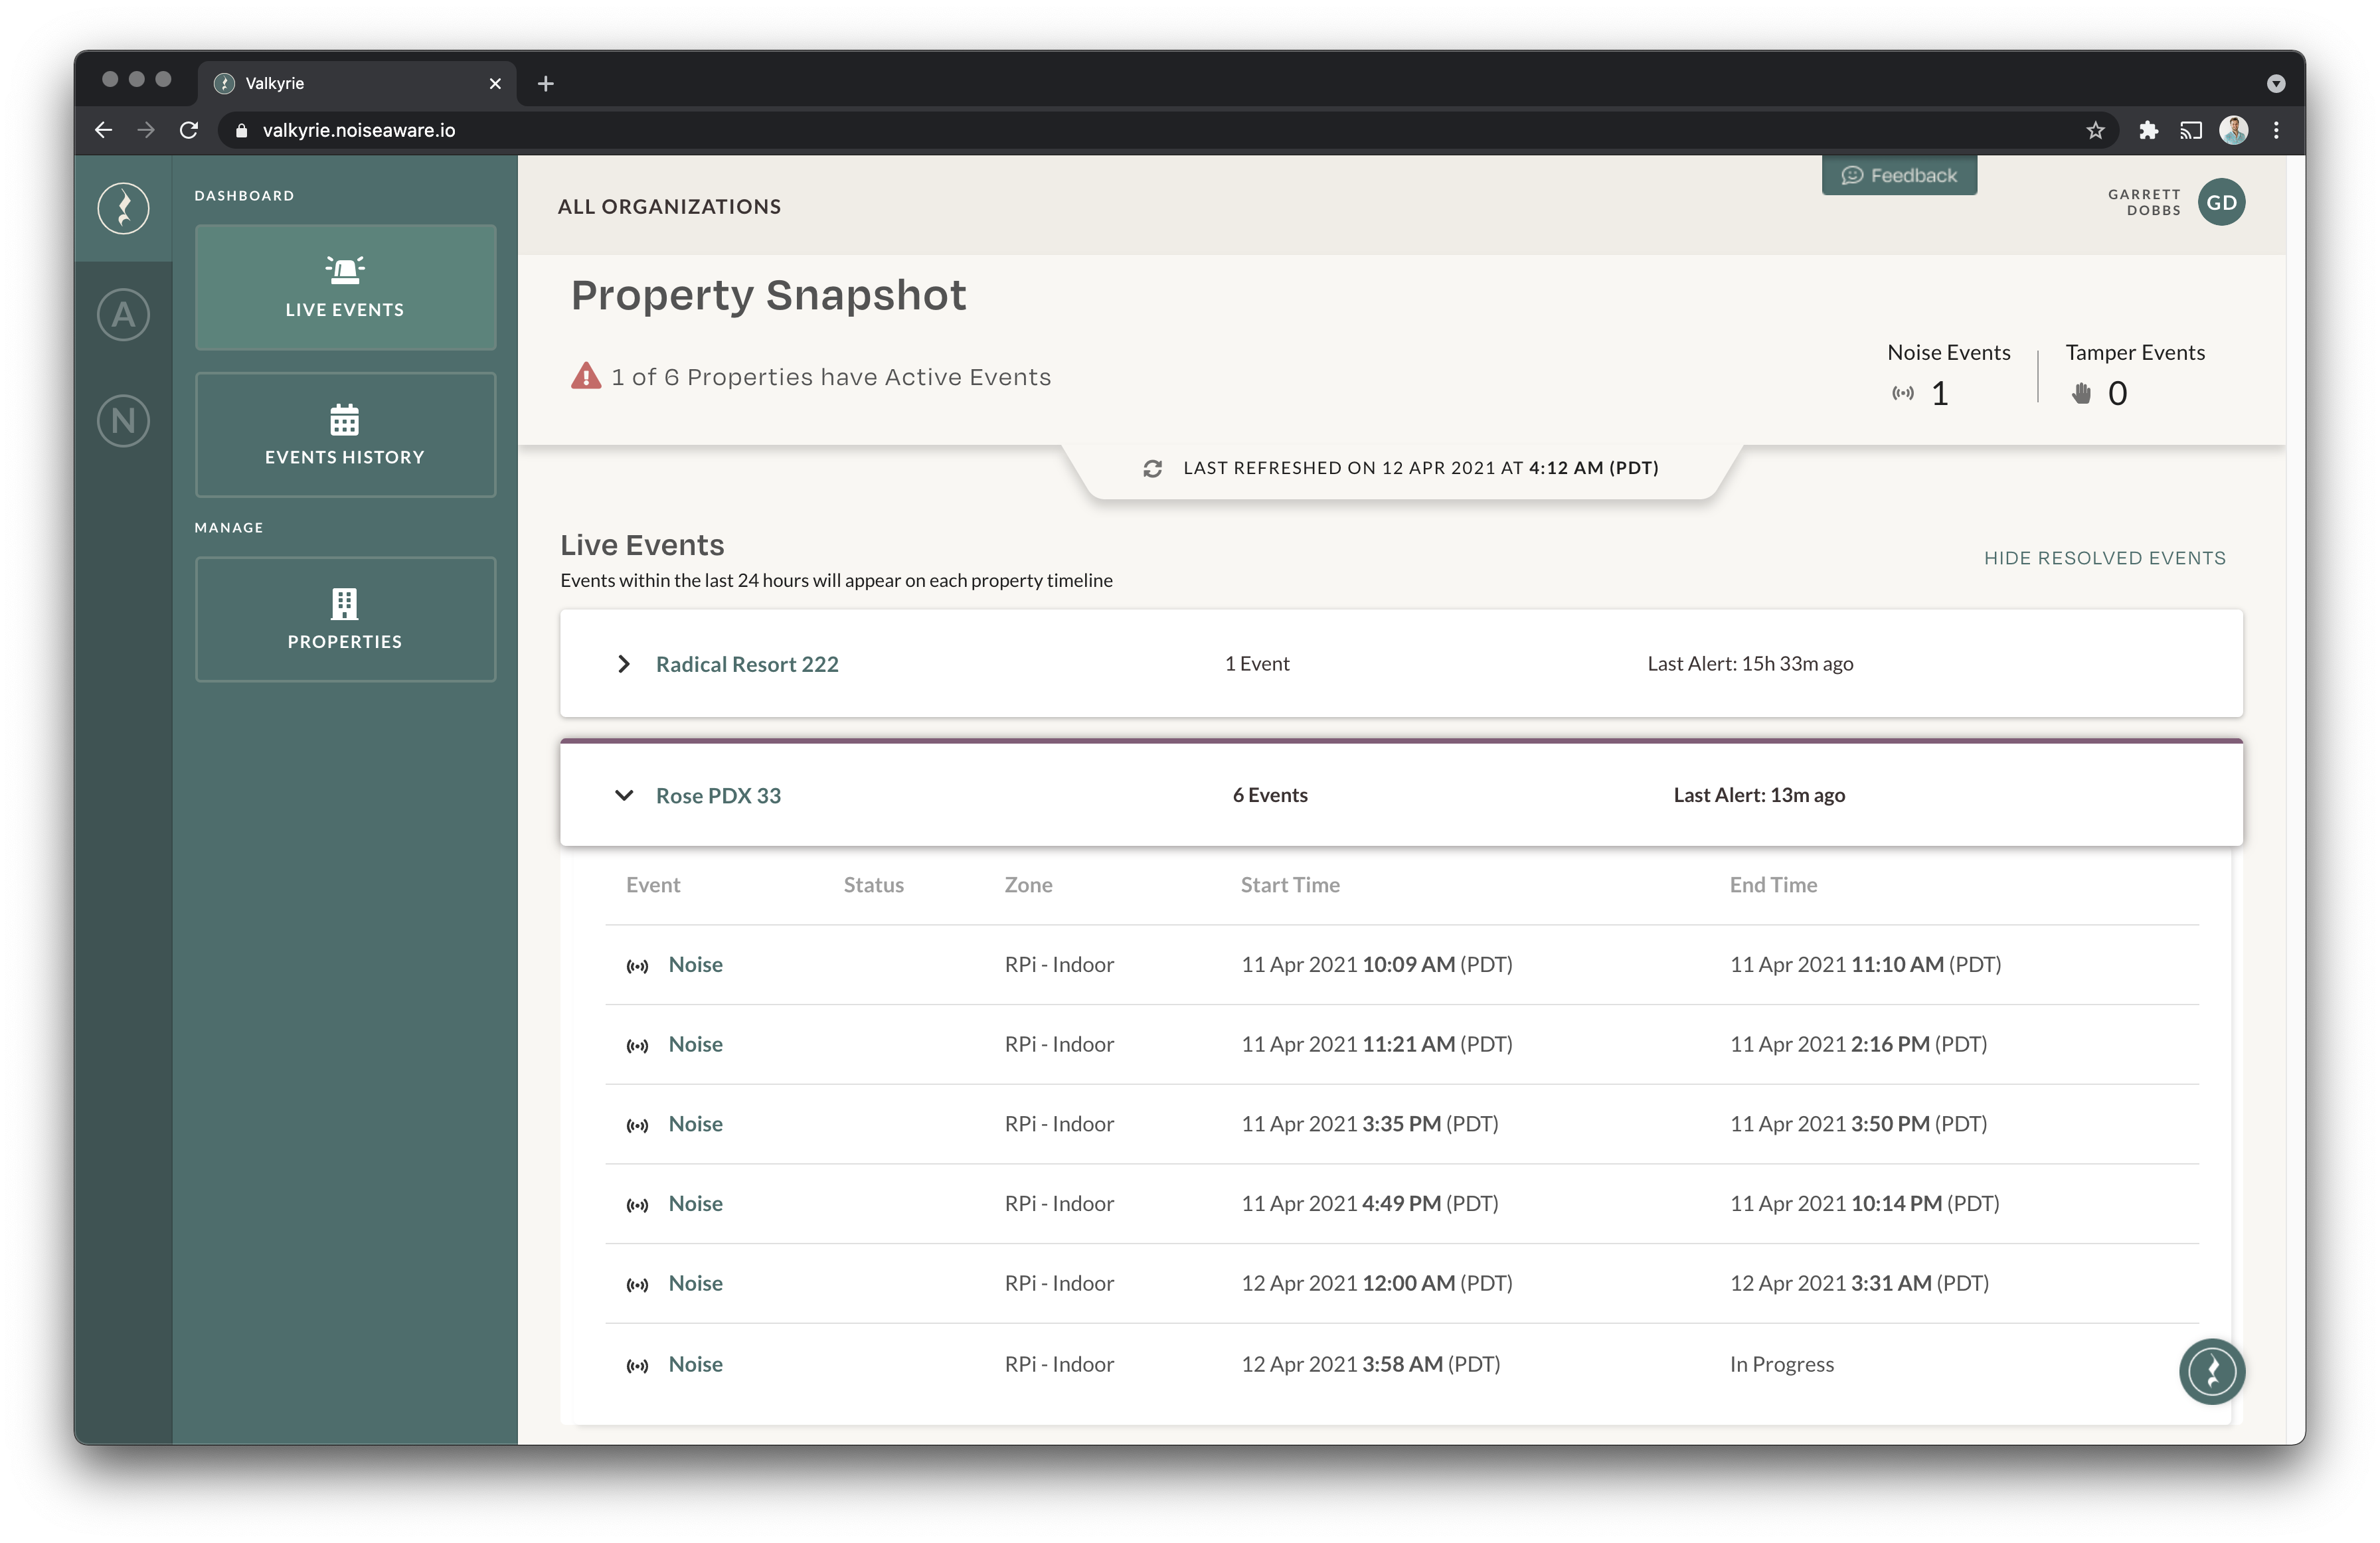
The Property Snapshot section across the top of the page shows the number of properties with active events that may require immediate attention (Noise events) as well as a count of each event.
Below the Property Snapshot you will find a list of any properties with events that started in the past 24 hrs, with an options to show or hide events that have resolved. Use the refresh tab in the middle of the page to keep up to date on new and recently resolved events across all of your properties.
Events History
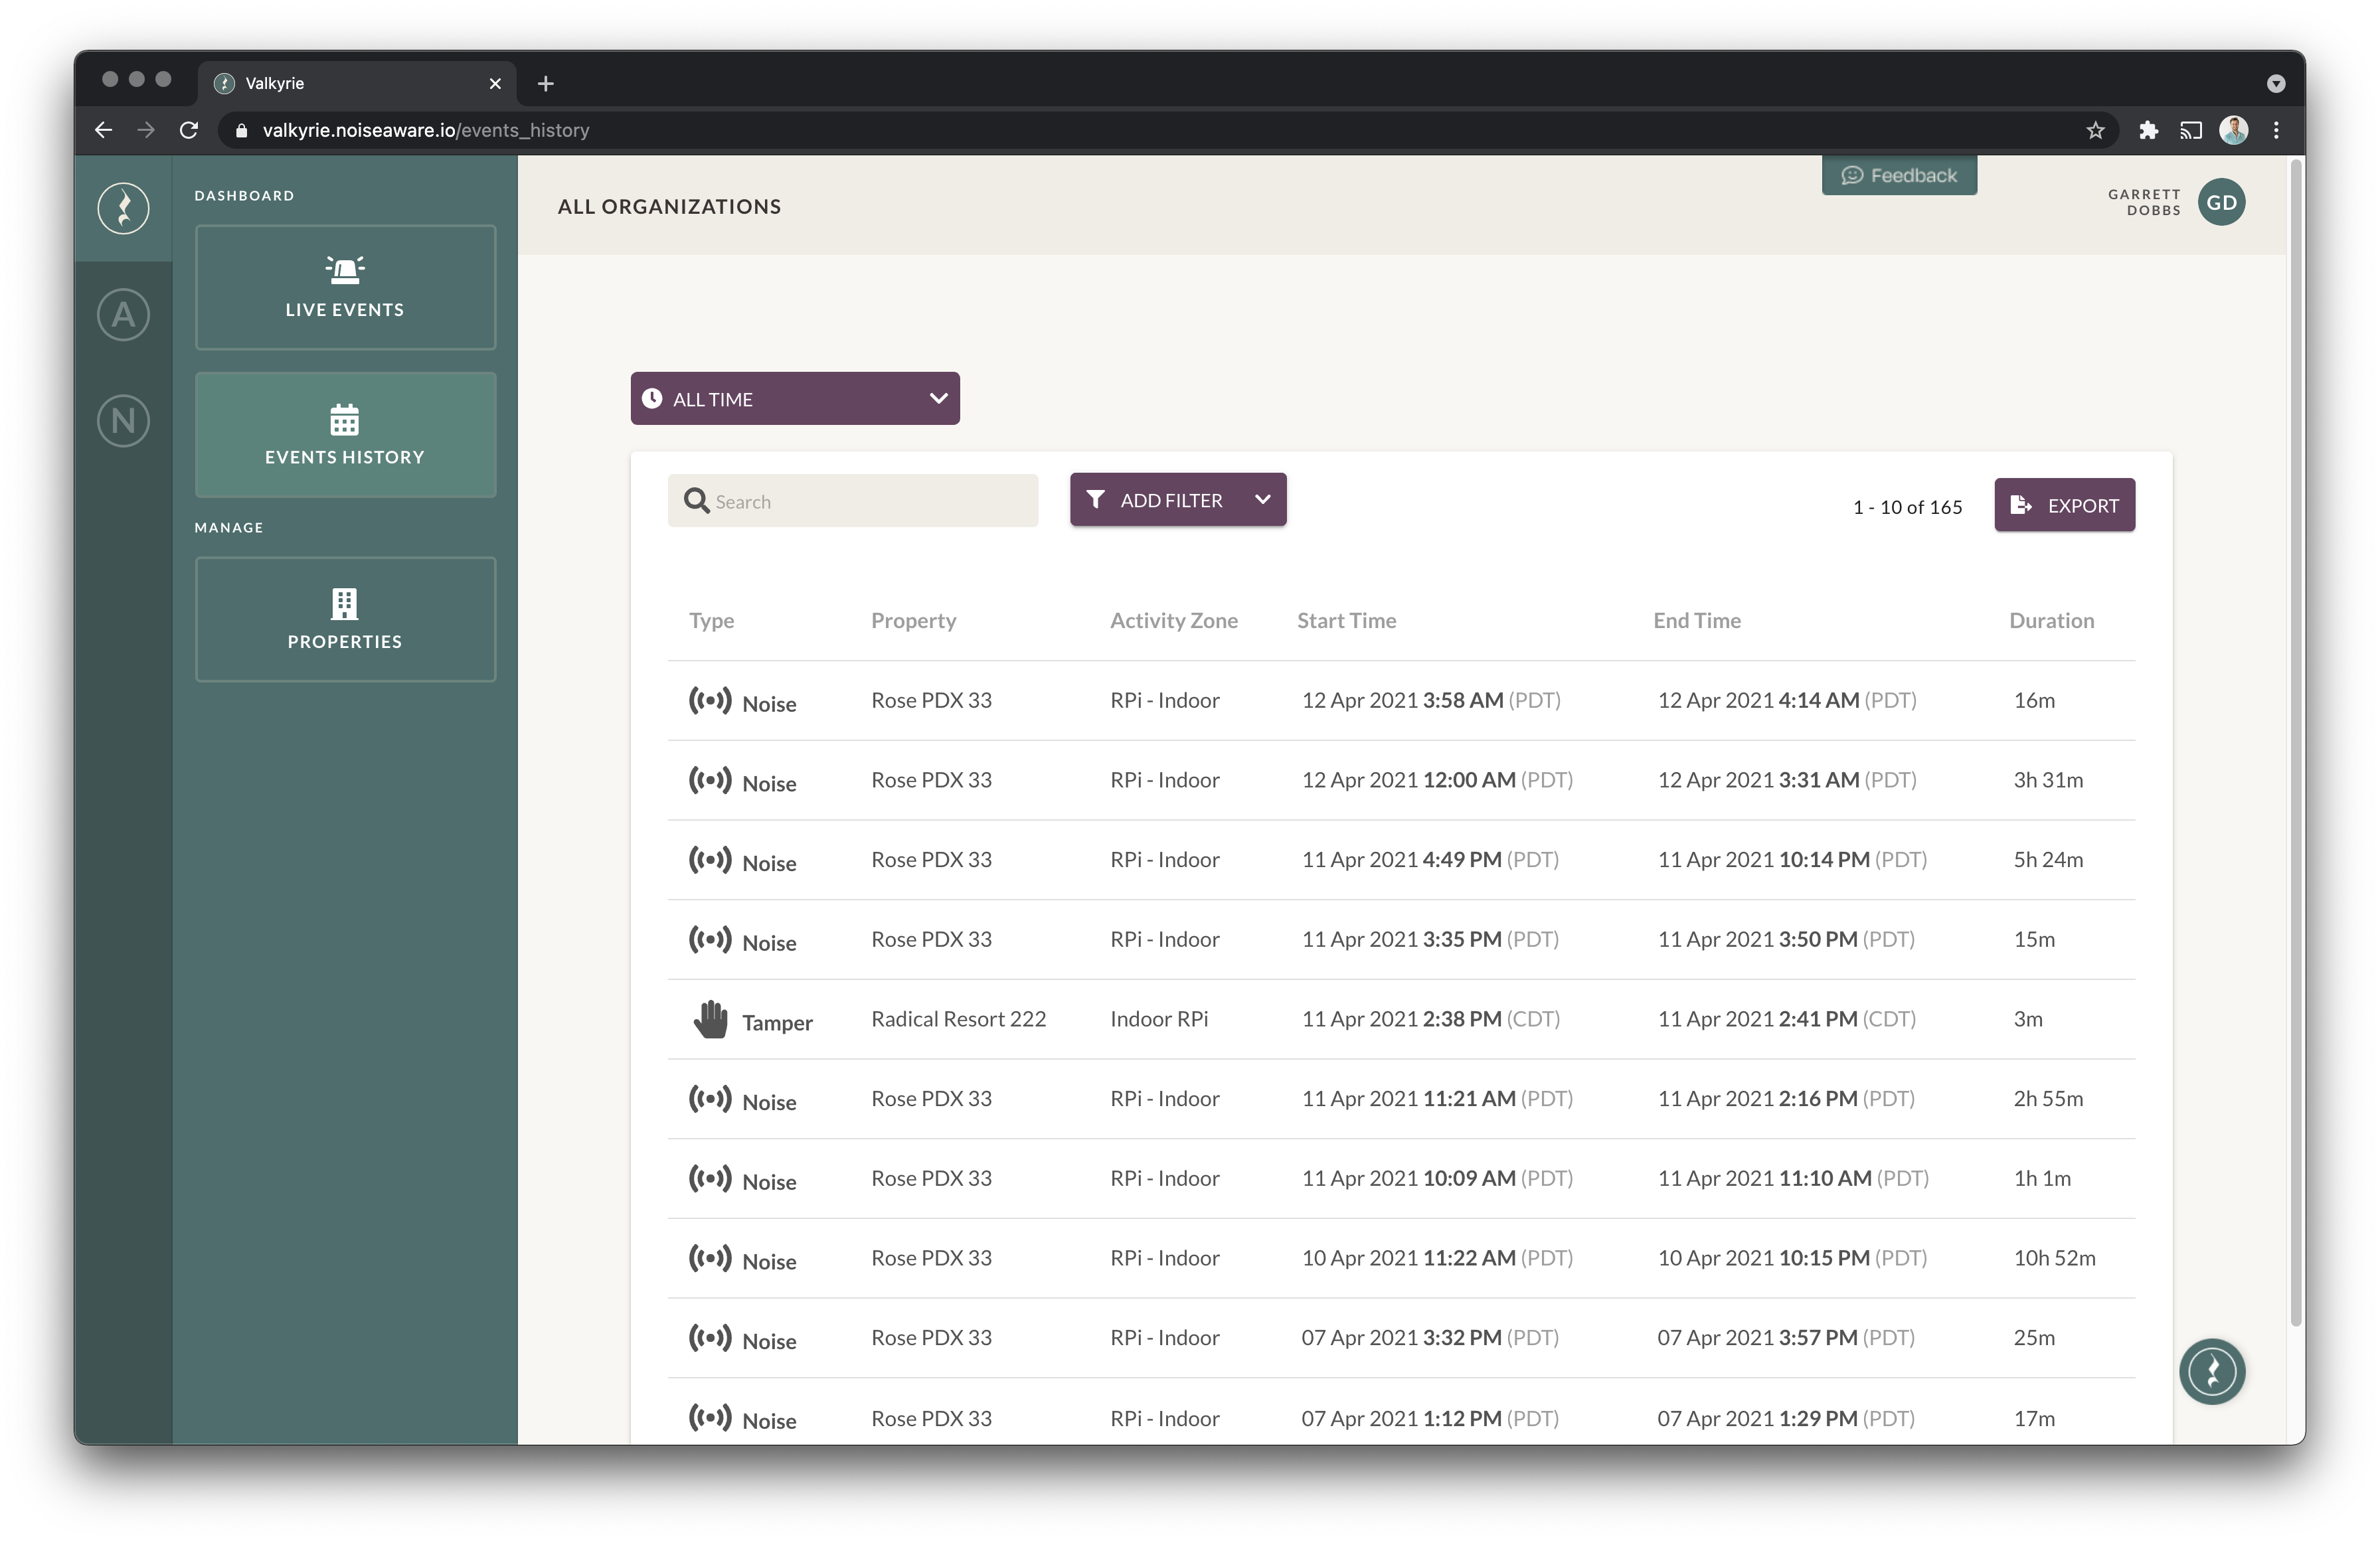
The Events History screen shows a list of all events across your properties. NoiseAware automatically tracks several types of events:
Noise = Sensor Detected Noise above it's Current Threshold
Disconnect = Sensor is Offline
Low Battery = Batteries need to be Replaced (Outdoor Sensors only)
Property Disconnect = All Sensors at the Property are Disconnected
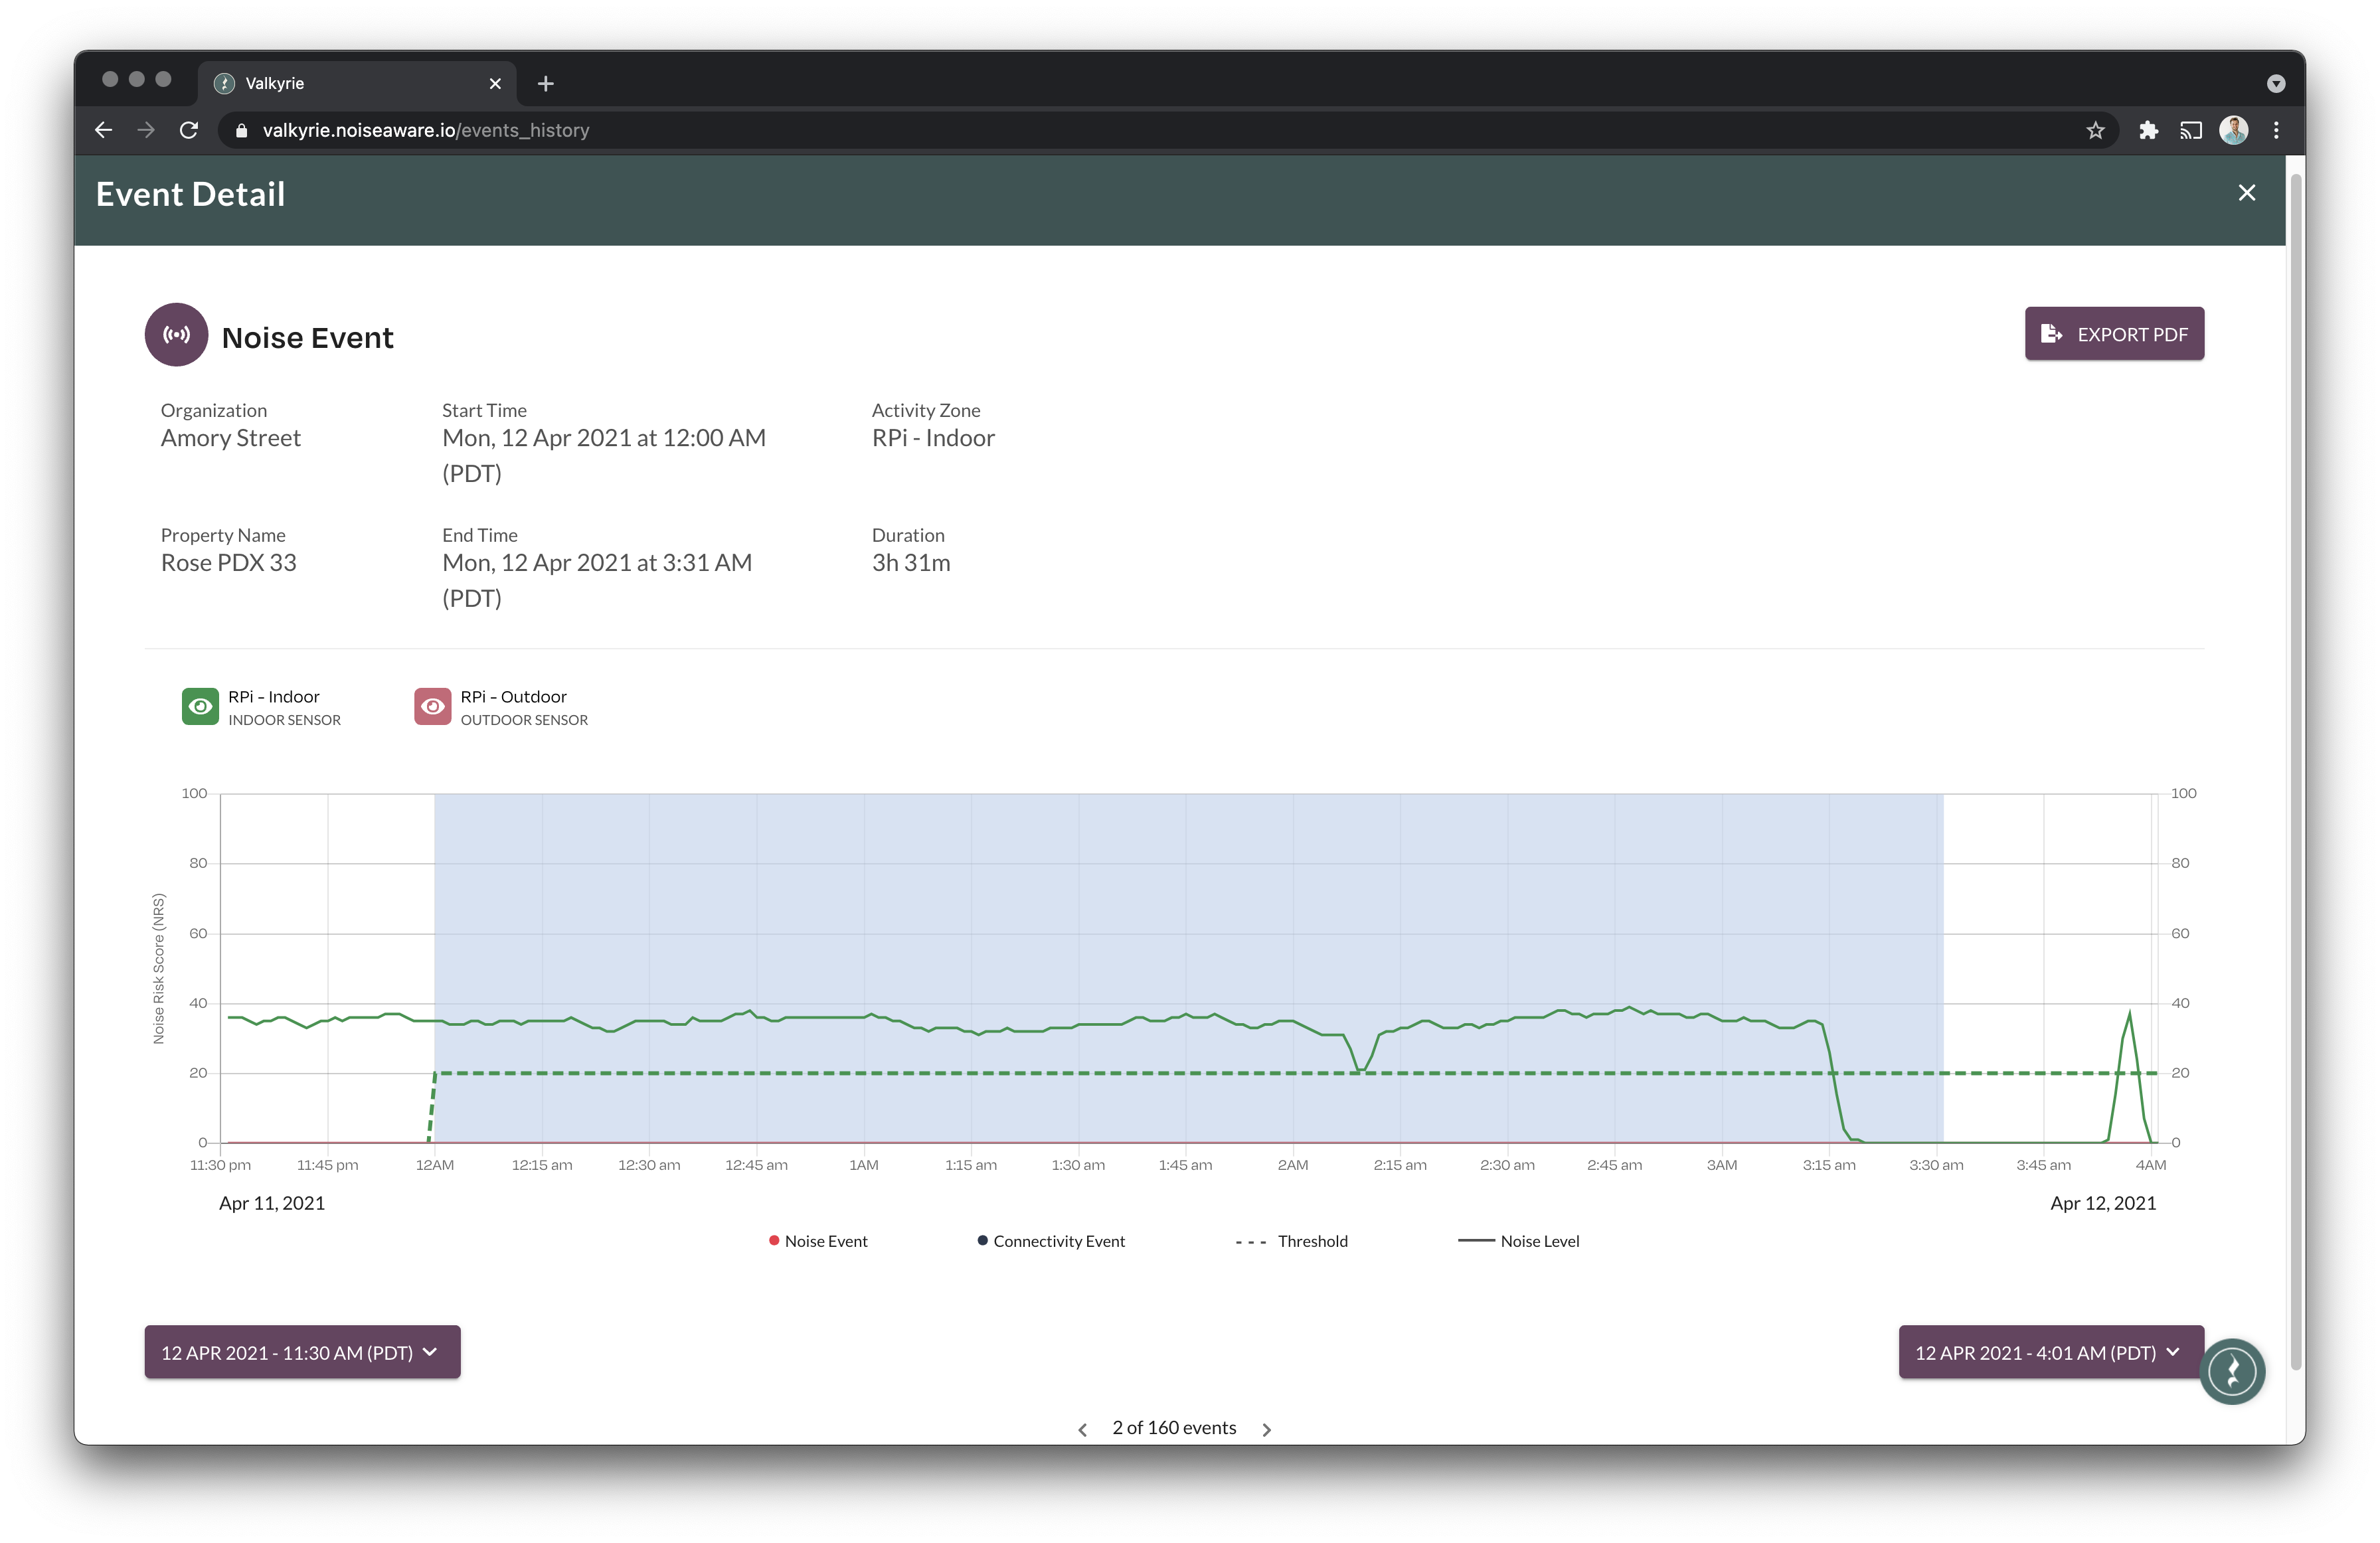
Event Detail
Clicking on an Event will show additional information, including the noise graph at the time of the event, and an option to download a report of the event.
Properties
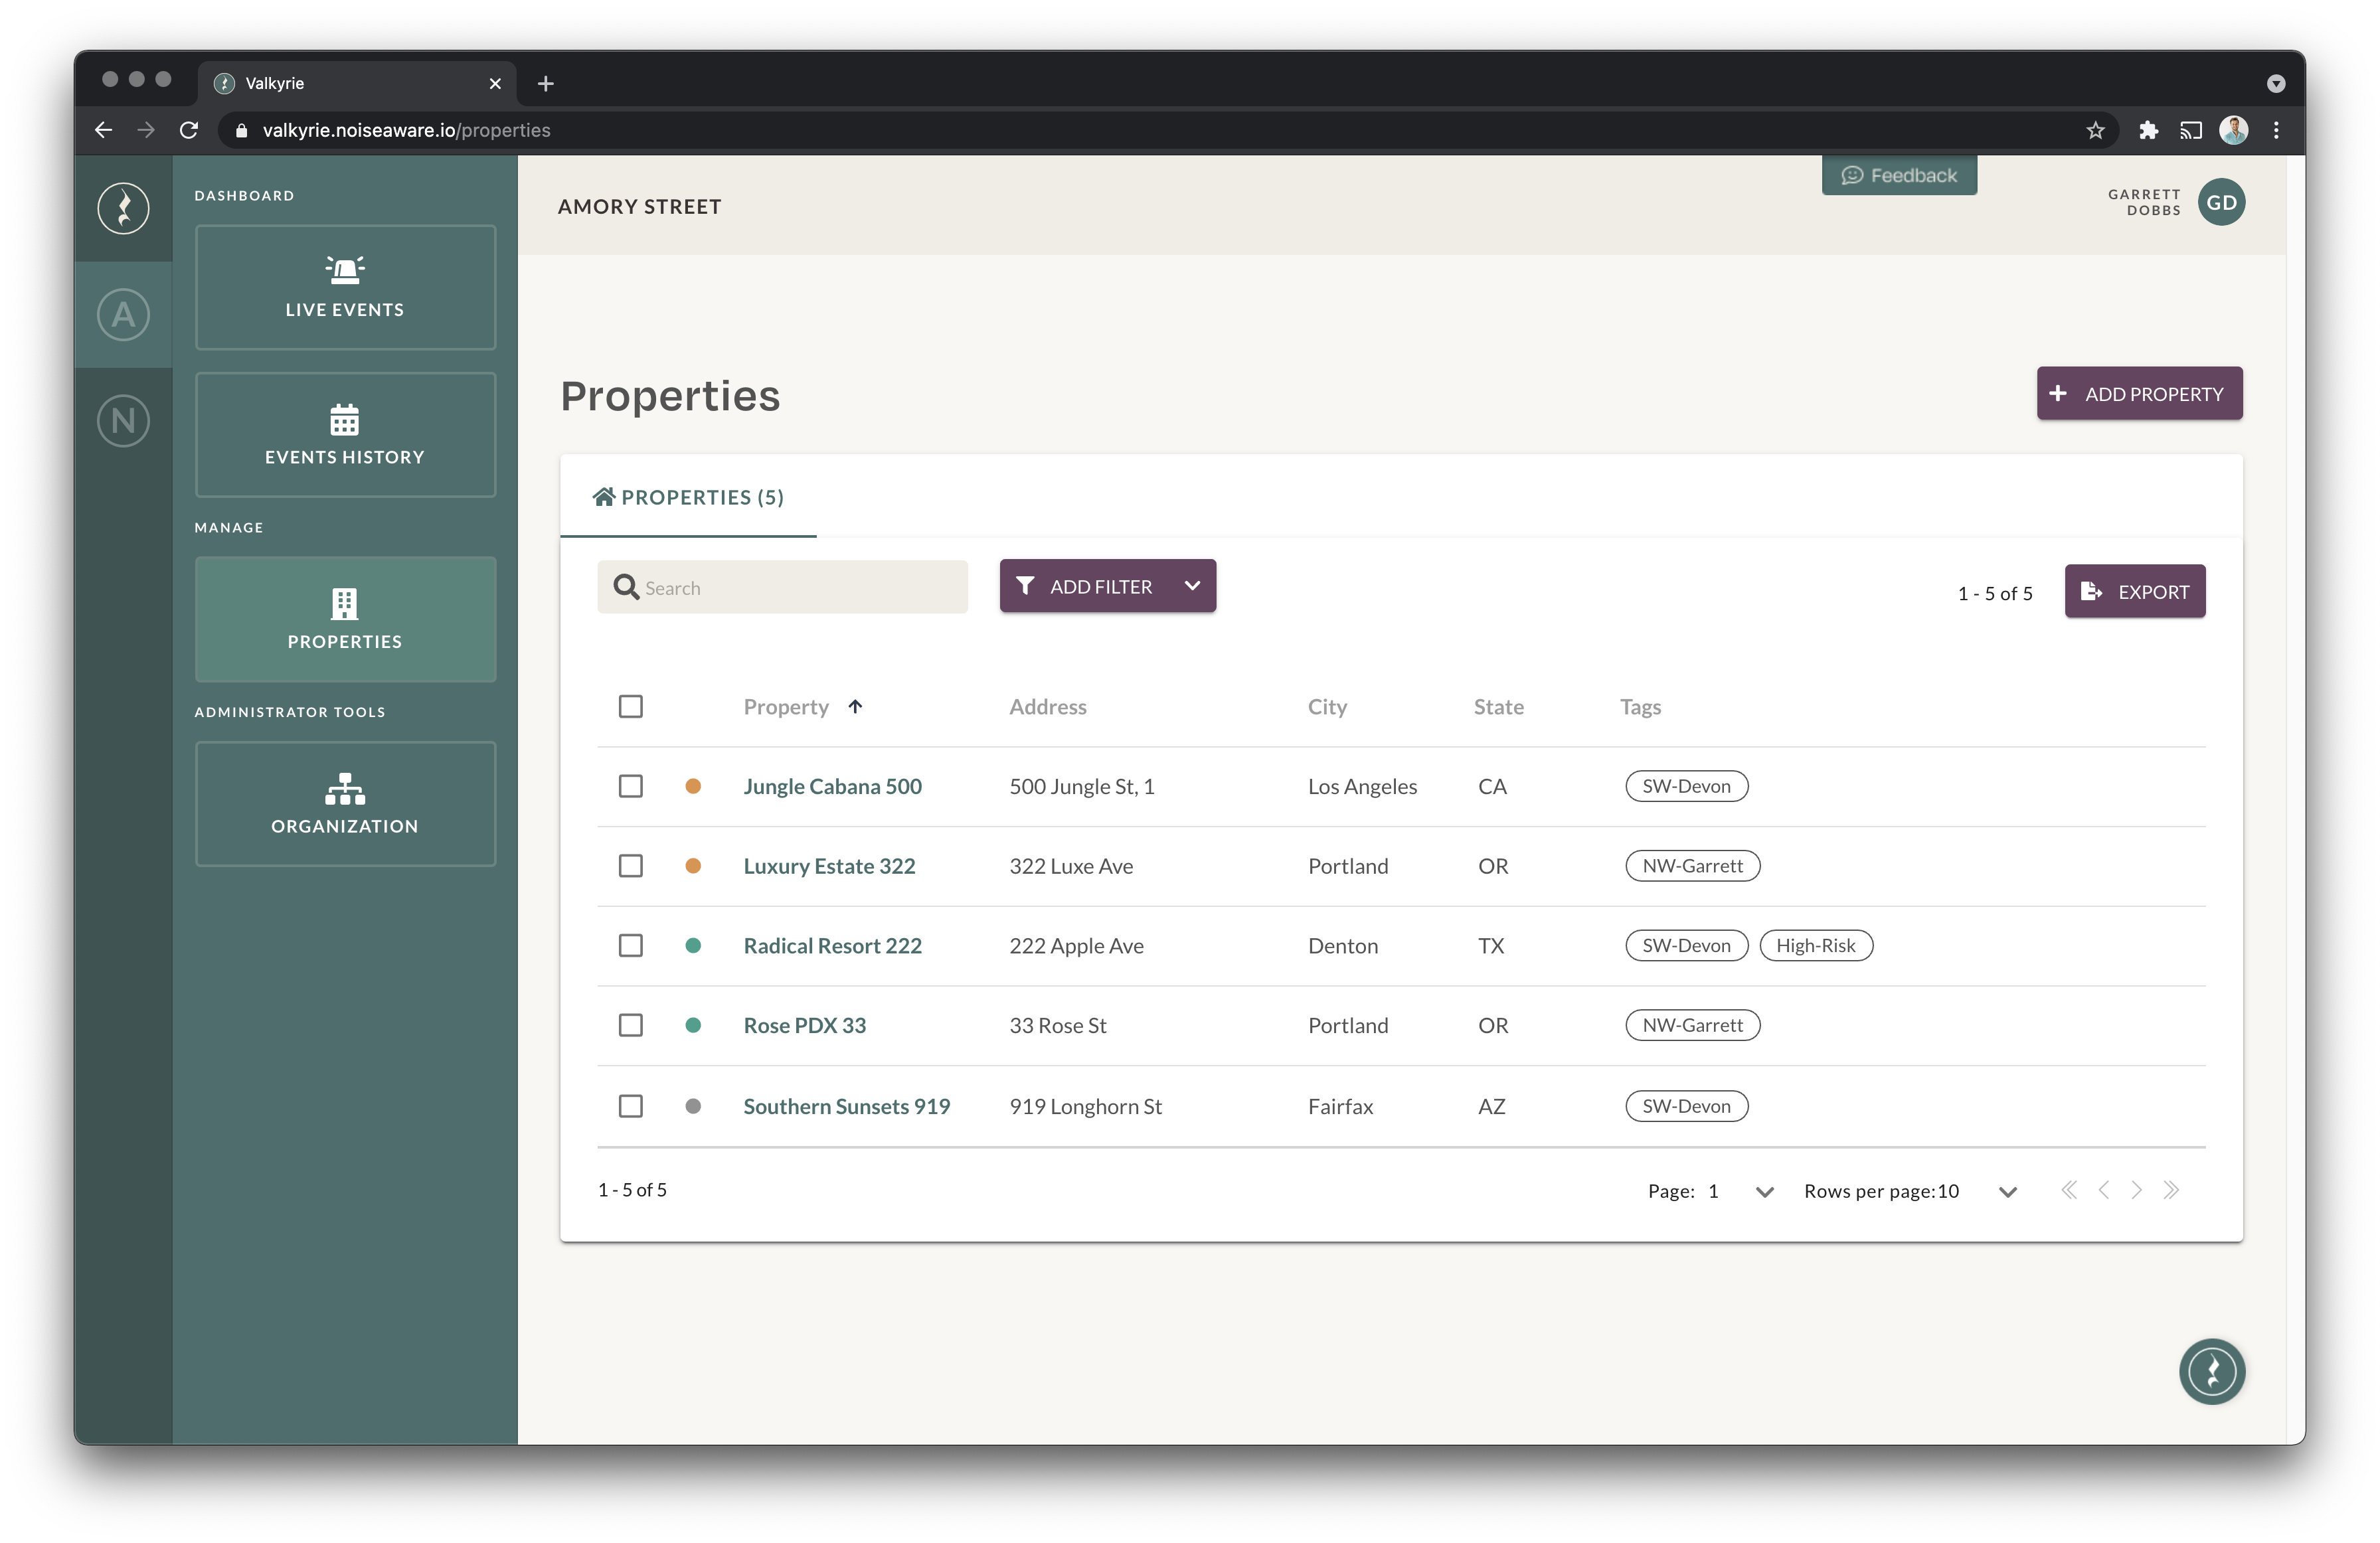
The Properties screen includes a complete list of every property you've added to NoiseAware. If you are using Property Tags to help organize your properties, you can see them on this list.
You can sort your list of properties by Property, City, or State by clicking on the title of each column, search the list by the names of your properties, or filter the list using the Add Filter button. You can now export additional information about your properties using the Export button (exported information will be filtered to match what's displayed on your screen).
Property Status is displayed with the color of the indicator at the left of the list. Hover over the indicator for a description of the status, which includes:
Green = All Sensors Online
Yellow = One or More Sensors Offline
Red = Active Noise Event
Grey = No Sensors Installed
Administrators and Managers will also see an Add Property button to create new properties in NoiseAware. If you are a member of multiple NoiseAware organizations, you will first need to select the Organization for which you want to add a property before it can be added.
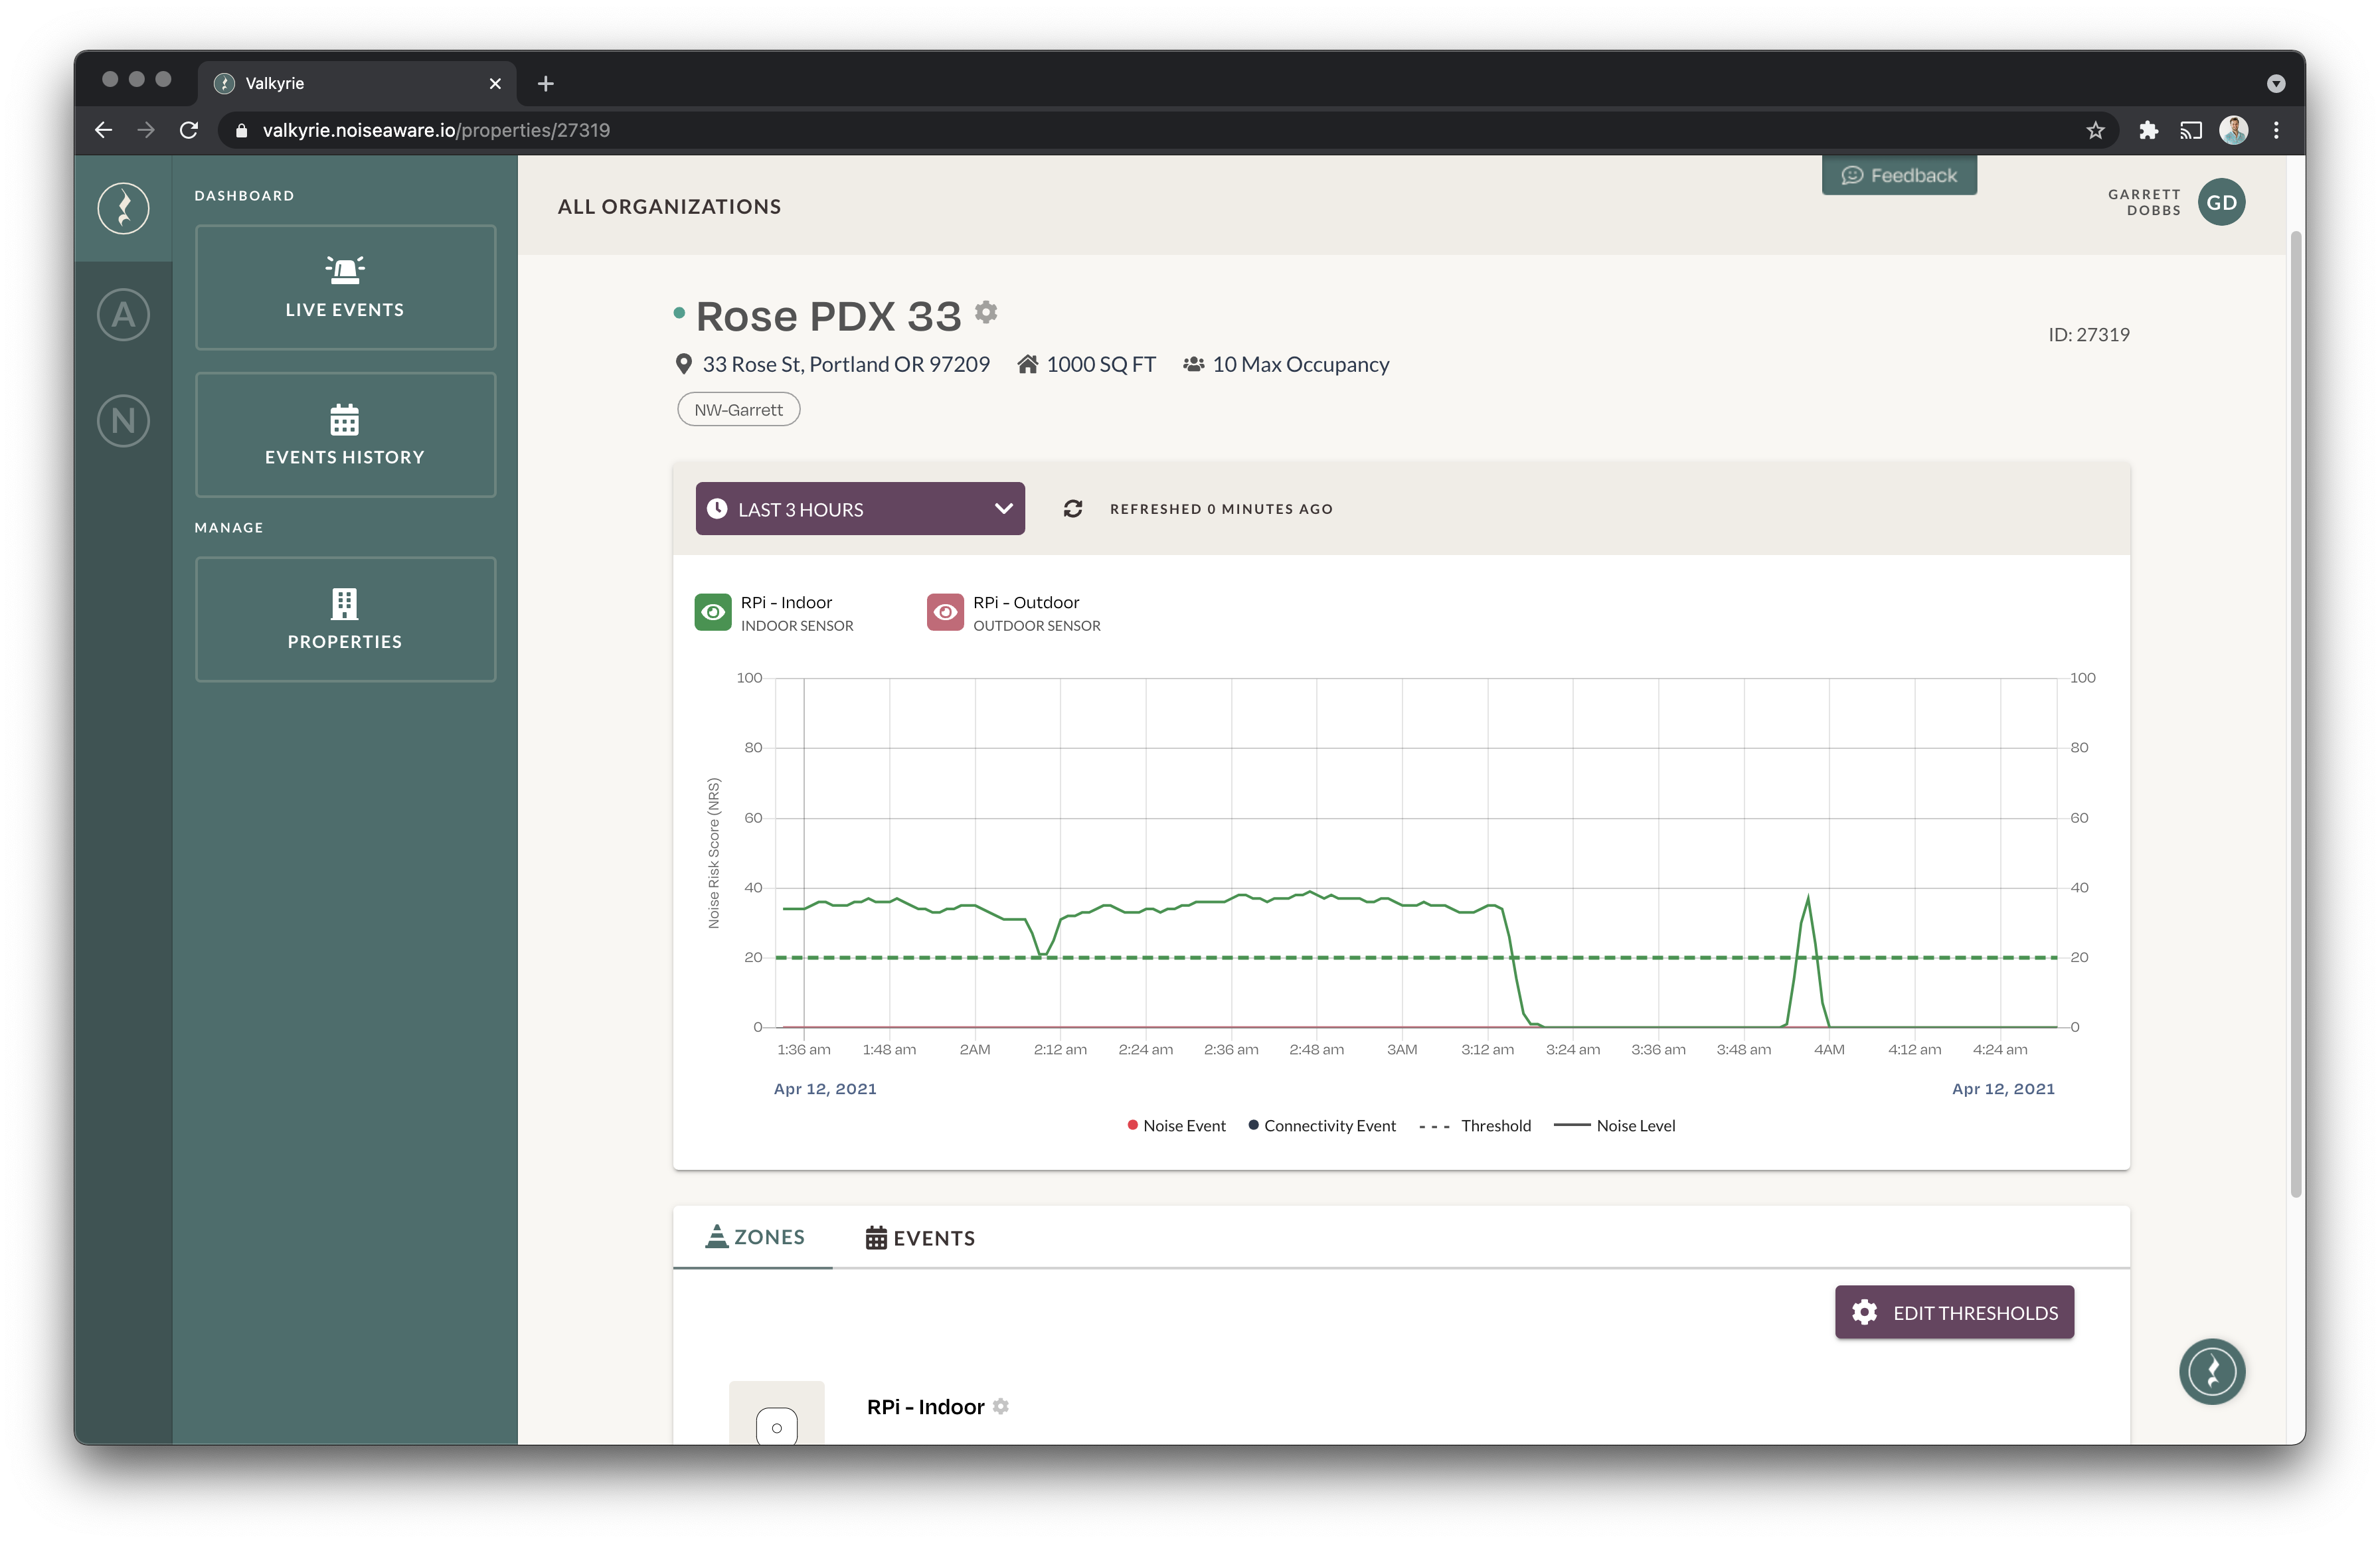
Property Detail
Clicking on a property will open the Property Detail screen, which has a few sections:
Property Information is displayed at the top of the page. Administrators and Managers can edit property information by clicking the Gear icon next to the property's name.
Noise Risk Score (NRS) Graph shows historical noise data at your property to
The panel at the bottom can be toggled to show the Zones at the property, or the history of Events at the property. Zones represent each of your installed sensors and include the current online status of each sensor. Administrators and Managers can edit the Thresholds of each Zone by clicking the Edit Thresholds button, and can see additional detail or edit the name of a Zone by clicking the Gear icon next to the Zone's name.
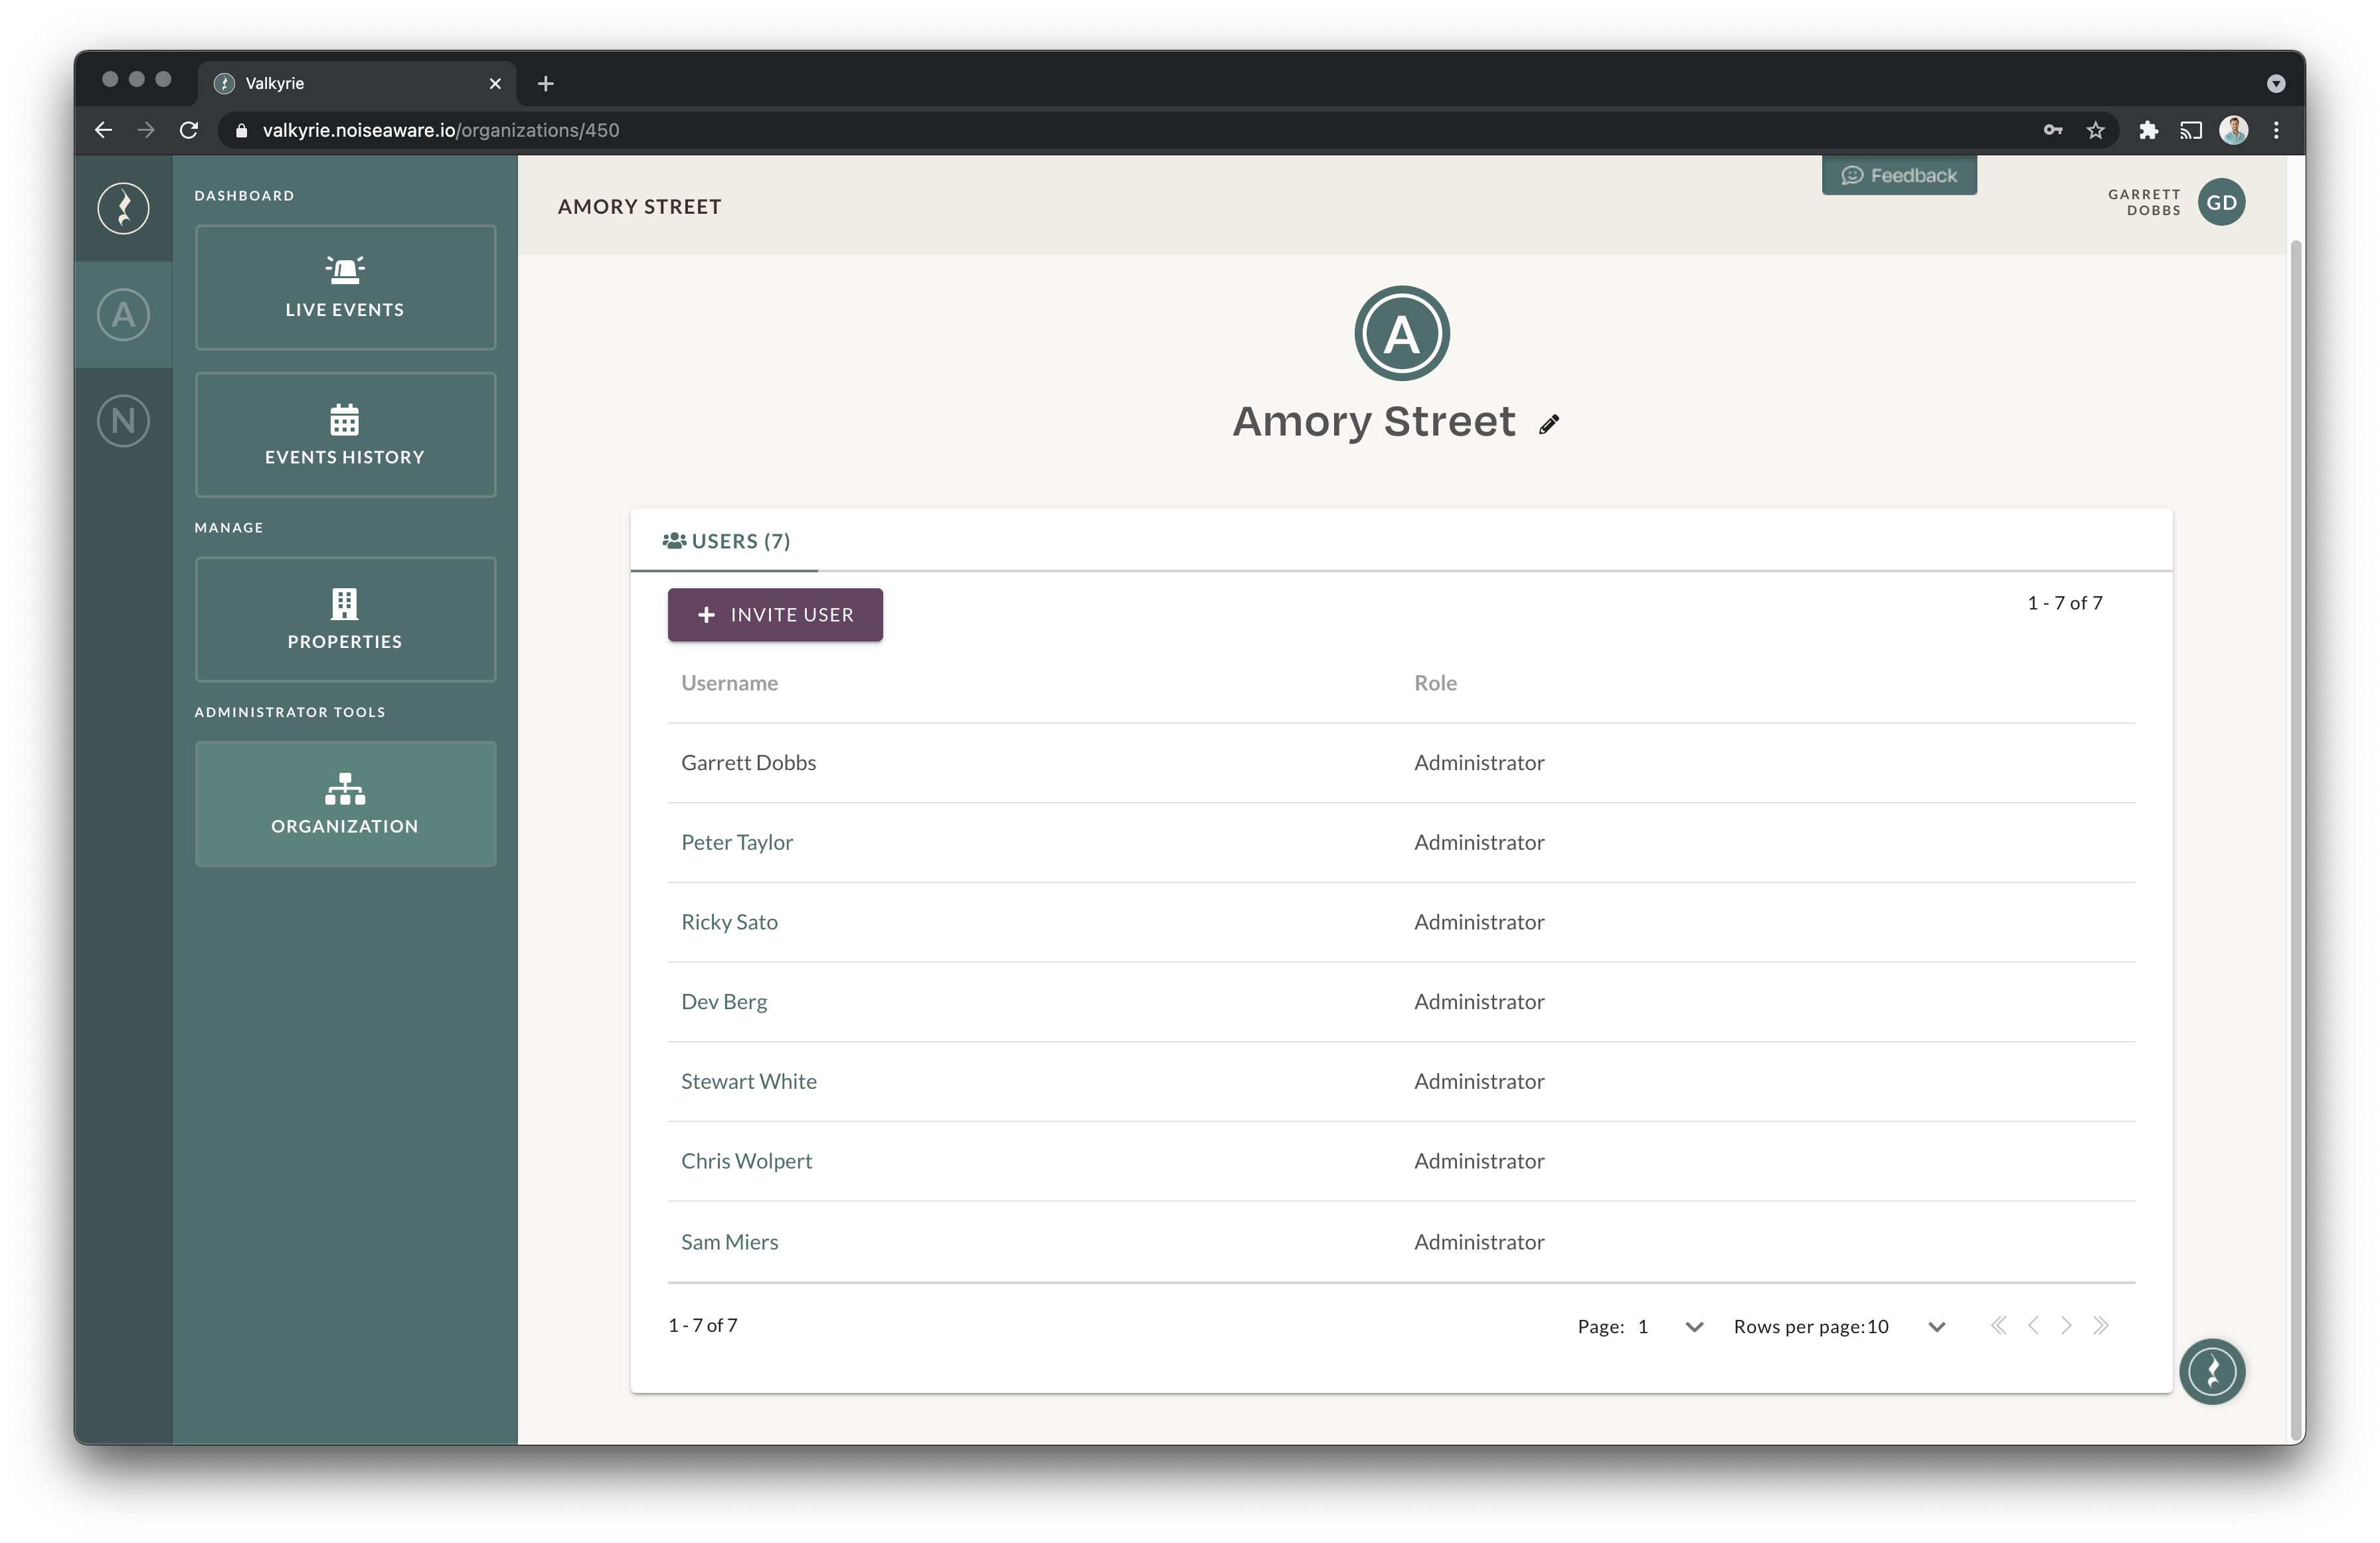
Organization
Administrators will also see an Organization link in their navigation, where you will have the options to edit the permissions and settings of user on your account, or invite new users. Users can be invited to each organization with one of three roles:
Administrator = Can view and edit all properties and manage users.
Manager = View or edit properties based on permissions. Cannot manage users.
Watcher = View-only role. Cannot edit properties or users.
If you are a member of multiple NoiseAware organizations, you will first need to select an Organization from the list at the left before you can see the Organization link.
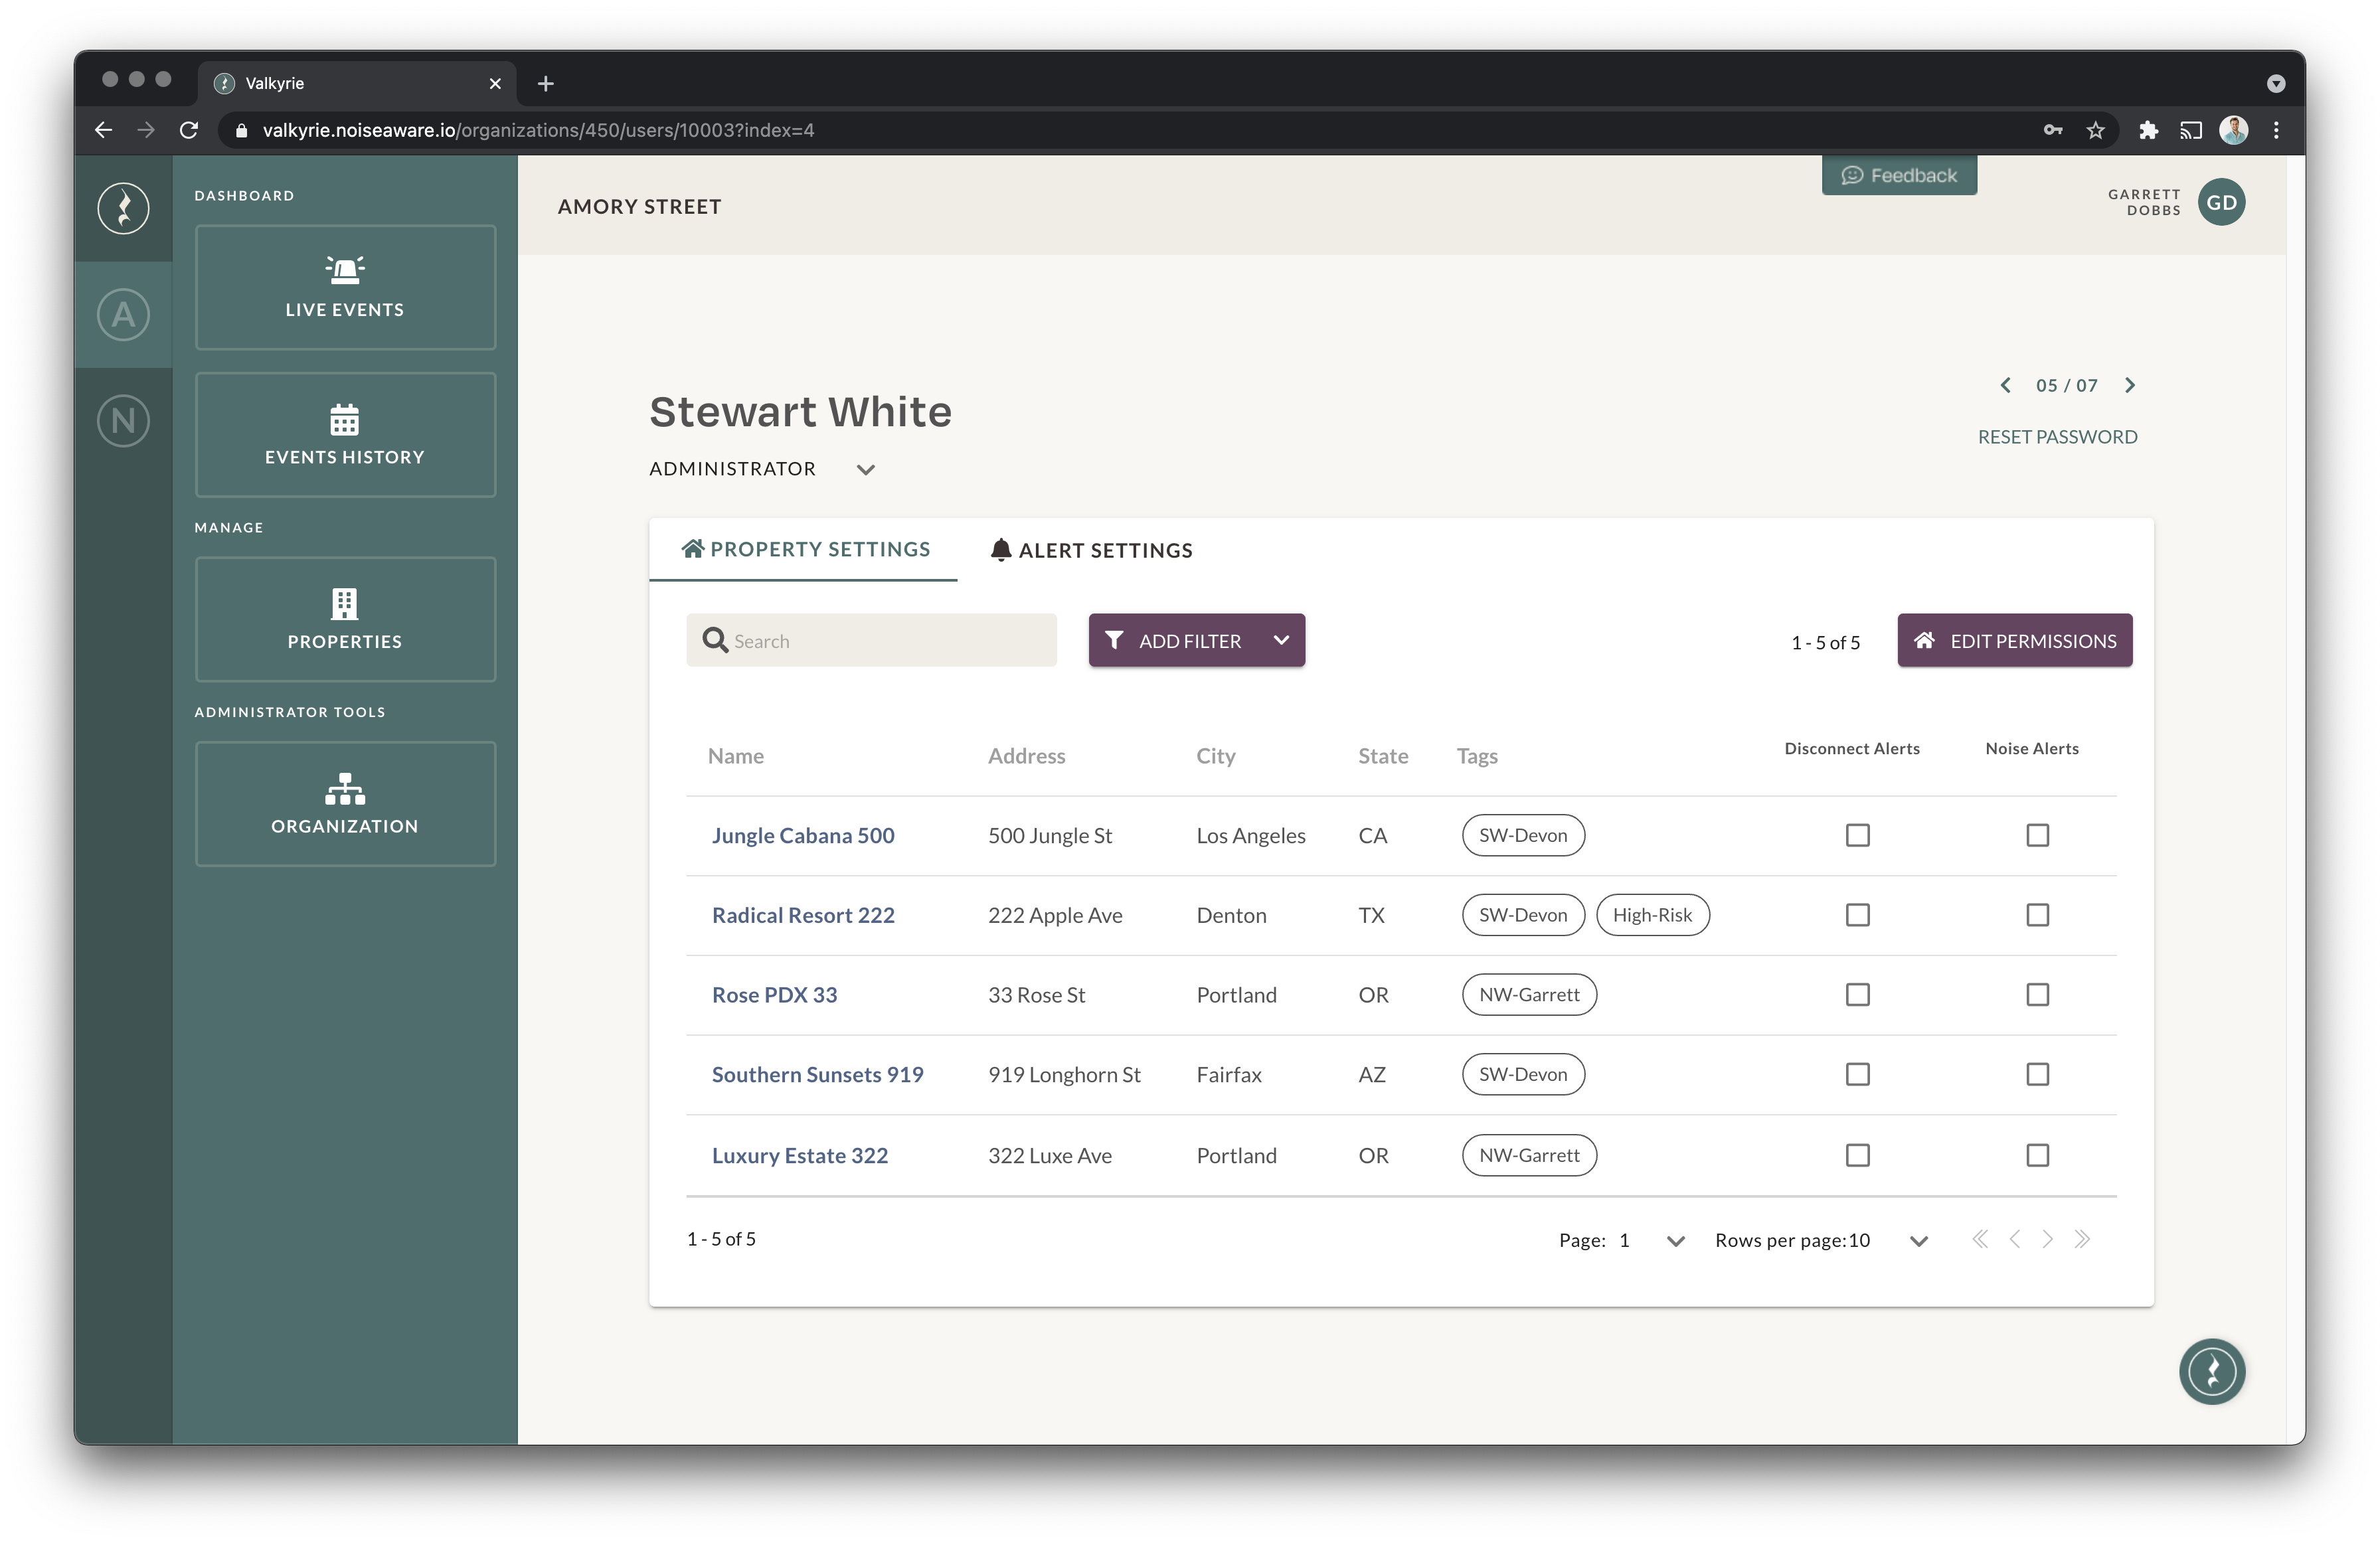
User Detail
Clicking on a user will show more information, including their Property Settings and Alert Settings. Under Property Settings you can manage which properties each user receives alerts for, and you will also have an option to Edit Permissions so that you can choose which properties Managers and Watchers on your account should see. Under Alert Settings you will see options that control how users receive NoiseAware alerts.
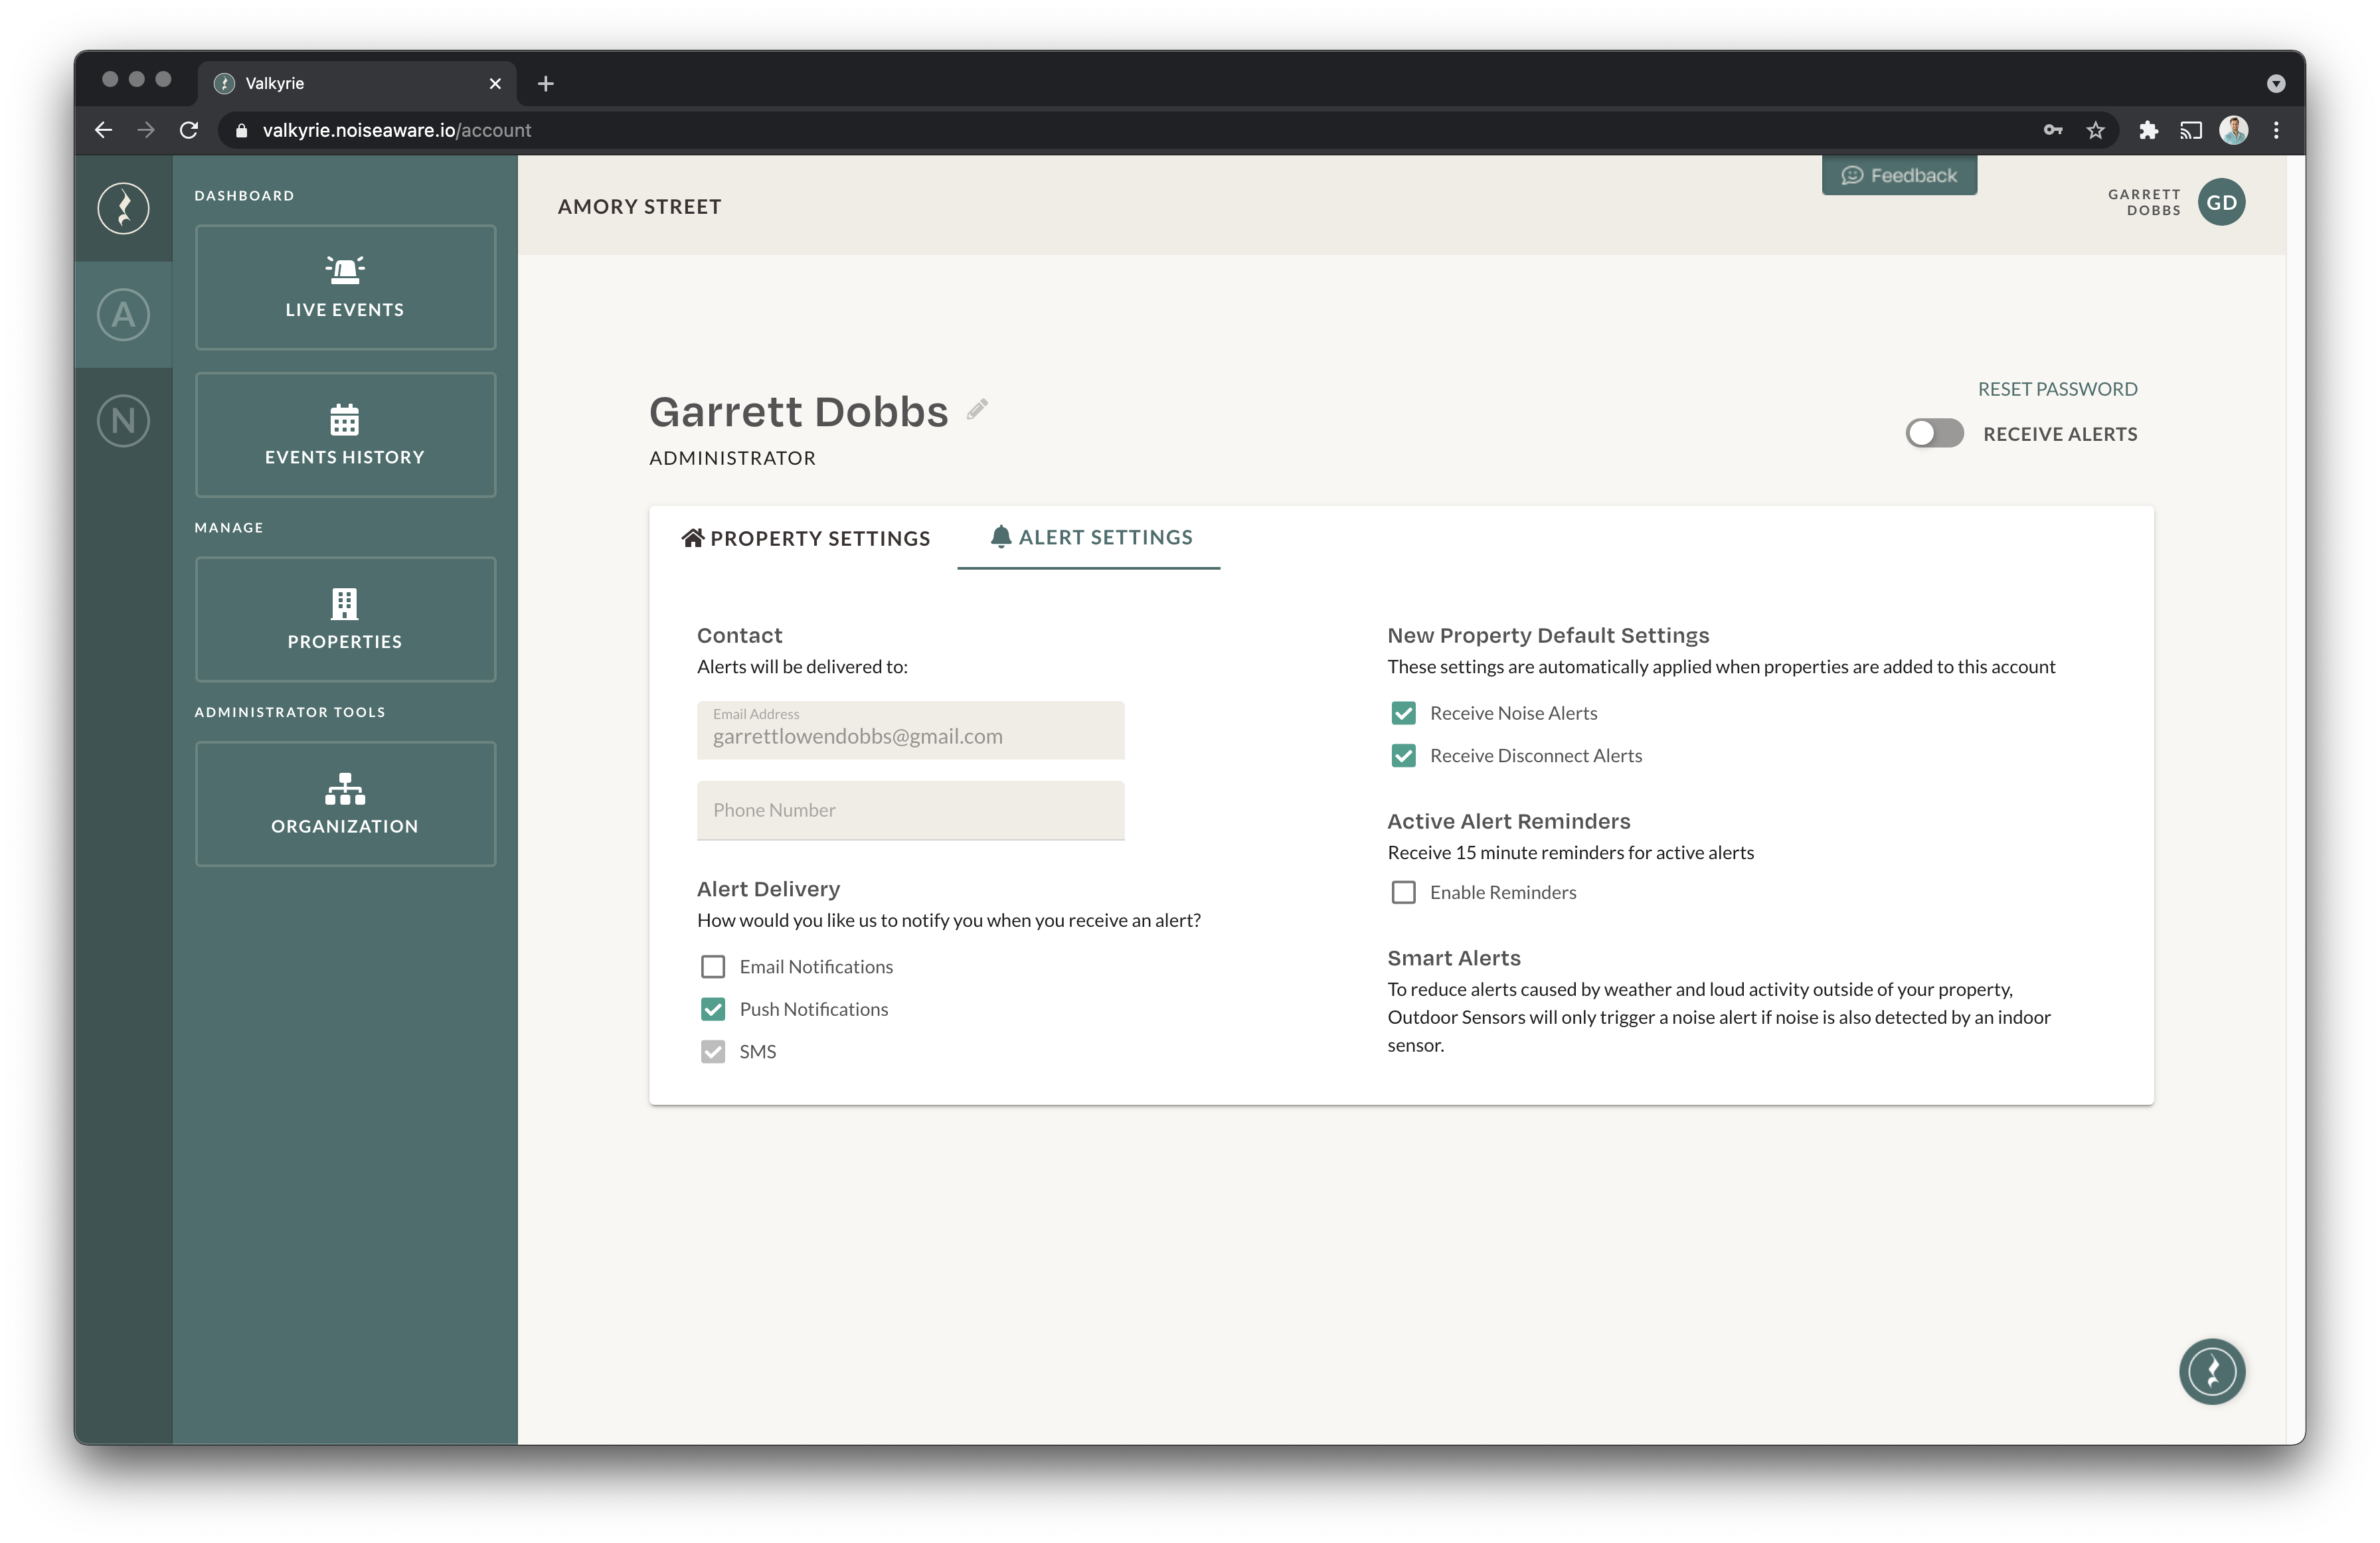
Account Settings
All users can edit their own Property Settings and Alert Settings by clicking the Account Settings option from their name in the top-right of the screen. The settings available from this screen match what an Administrator can see in the User Detail screen (above), except that users cannot edit their own permissions to properties.
If you have any questions don't hesitate to ask, you can find live chat in the bottom-right corner of every screen on our website and in the dashboard.